Example: Creating a Console Application "Hello C#"
Let's create our first console program in Visual Studio. We will start the Visual Studio IDE, will create a new console-based C# project, will write a few lines of C# code and will compile and run the program. Finally, we will submit our C# code for evaluation in the automated Judge system.
Video: Console Application in Visual Studio
Watch a video lesson about how to create a console app in Visual Studio: https://youtu.be/ecAXCjjk6Nw.
Console App in Visual Studio: Step by Step
We already have Visual Studio and we can start it. Then, we create a new console project: [File] → [New] → [Project] → [Visual C#] → [Windows] → [Console Application].
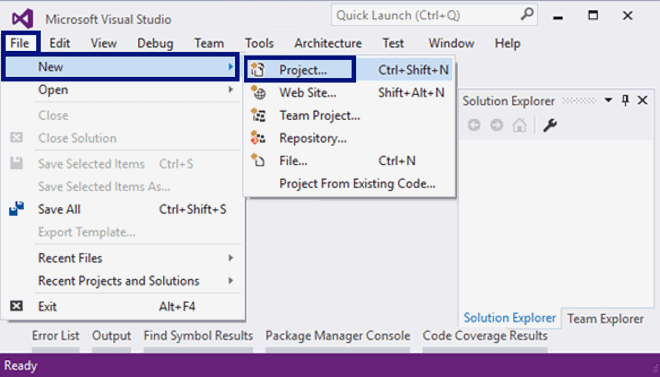
We set a meaningful name to our program, for example HelloCSharp: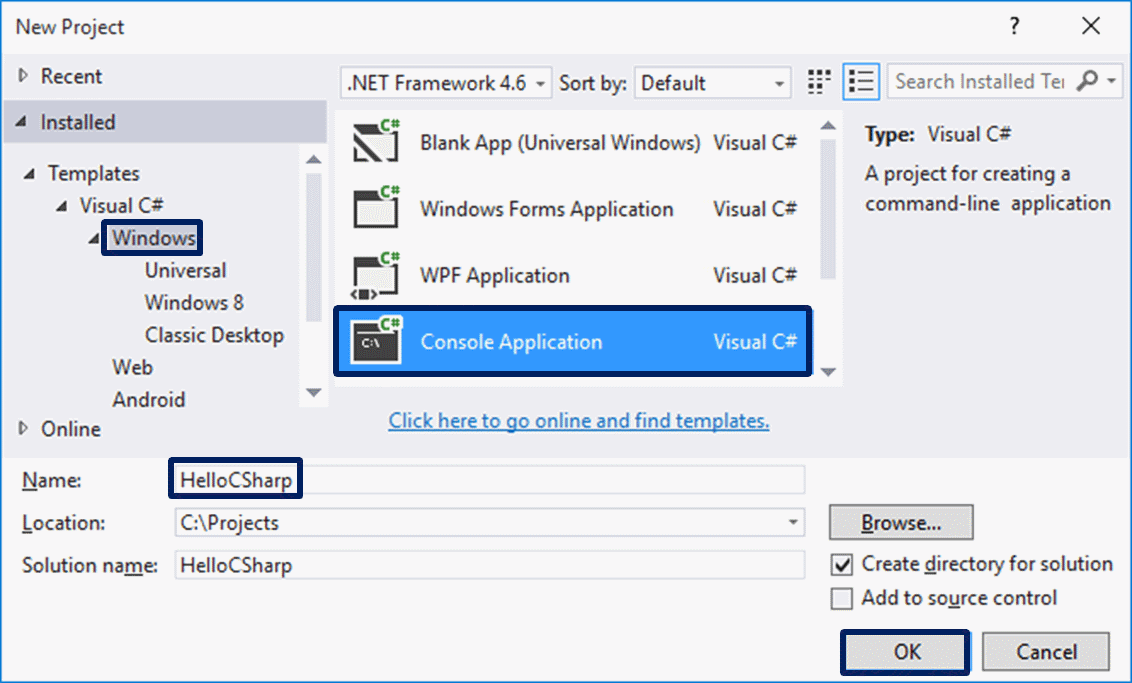 Visual Studio is going to create for us an empty C# program, which we have to finish writing (VS Solution with VS Project in it, with C# source file in it, with one C# class in it, with
 Main() method in it).
Writing the Program Code
The source code of the C# program is written in the section Main(string[] args), between the opening and the closing parentheses { }. This is the main method (action), that is being executed with the start of a C# program. This Main() method can be written in two ways:
static void Main(string[] args)– with parameters from the command line (we are not going into details)static void Main()– without parameters from the command line.
Both ways are valid, as the second one is recommended, because it is shorter and clearer. By default, though, when creating a console application, Visual Studio uses the first way, which we can edit manually if we want to, and delete the part with the parameters string[] args.
Press [Enter] after the opening parentheses { and start writing. The code of the program is written inwards, as this is a part of shaping up the text for convenience during a review and/or debugging.
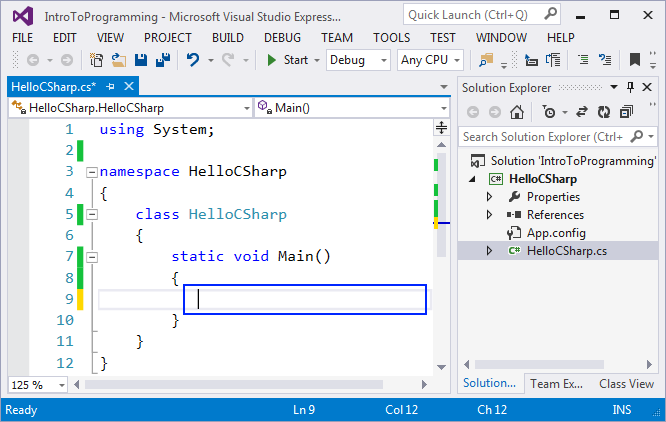
Write the following command:
Console.WriteLine("Hello C#");
Here is how our program should look like in Visual Studio:
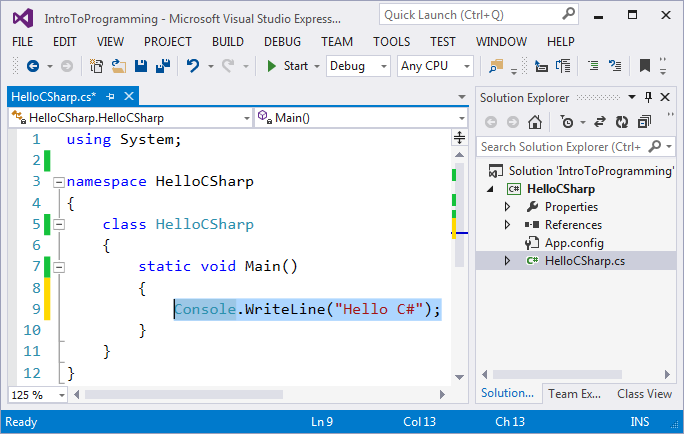
The command Console.WriteLine("Hello C#") in the C# language means to execute printing (WriteLine(…)) on the console (Console) and to print the text message Hello C#, which we should surround by quotation marks, in order to clarify that this is a text. In the end of each command in the C# language the symbol ; is being put and it says that the command ends in that place (it doesn't continue on the next line).
This command is very typical in programming: we say a given object should be found (in this case the console) and some action should be executed upon it (in this case it is printing something that is given inside the brackets). More technically explained, we call the method WriteLine(…) from the class Console and give as a parameter to it a text literal "Hello C#".
Starting the Program
To start the program, press [Ctrl + F5]. If there aren't any errors, the program will be executed. The result will be written on the console (in the black window):

Notice that we start it with [Ctrl+F5], and not only [F5] or with the start button in Visual Studio. If we use [F5], the program will run shortly and right afterwards the black window will disappear, and we are not going to see the result.
Actually, the output from the program is the following text message:
Hello C#
The message "Press any key to continue . . ." is displayed additionally on the last line on the console after the program ends, in order to push us to see the result from the execution and to press a key to close the console.
Testing the Program in the Judge System
Testing of the problems in this book is automated and is done through the Internet, using the Judge System: https://judge.softuni.org website. The evaluation of the tasks is done immediately by the system. Each task goes through a sequence of tests, as every successfully passed test gives the points assigned for it. The tests that are applied to the tasks are hidden.
We can test the above program here: https://judge.softuni.org/Contests/Practice/Index/503#0. We place the source code from the program in the black field and we choose C# code, the way it is shown:
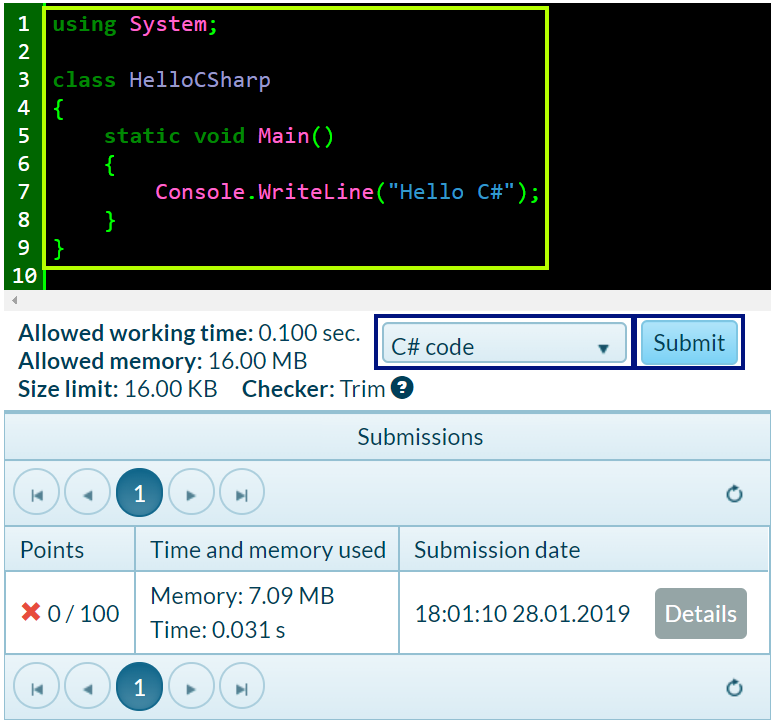
We send our solution for evaluation using the [Send] button. The system gives a result back in a few seconds in the table with sent solutions. When necessary, we can press the button for renewing the results [refresh] in the upper right side of the table with sent solutions:
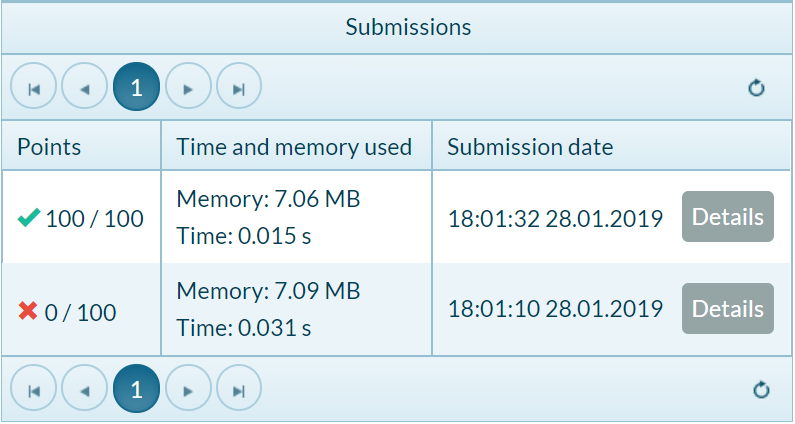
In the table with the sent solutions the judge system is going to show one of the following possible results:
- Points count (between 0 and 100), when the submitted code is compiled successfully (there are no syntax errors) and can be tested.
- When the solution is correct all of the tests are marked in green and we get 100 points.
- When the solution is incorrect some of the tests are marked in red and we get incomplete or 0 points.
- When the program is incorrect, we will get an error message upon compiling.
How to Register in SoftUni Judge?
If you don't have a registration in the Judge system, create one. It takes only a minute – a standard registration in an Internet site.
Testing the Programs That Play Notes
Now, after you know how to run programs, you can test your example programs that play musical notes. Have some fun, try these programs out. Try to change them and play with them. Change the command Console.WriteLine("Hello C#"); with the command Console.Beep(432, 500); and start the program. Check if the sound of your computer is on and whether it's turned up. If you work in an online environment, you will not hear a sound, because the program is not executed on your computer, but elsewhere.