Lab: Turtle Graphics GUI Application
In the current chapter we learned about loops as a programming construction that allows to repeat a particular action or a group of actions multiple times. Now let's play with them. In order to do that, we will draw some figures that will consist of a large number of repeating graphical elements, but this time we will not do it on the console, but in a graphical environment using "turtle graphics". It will be interesting. And it is not hard at all. Try it!
Video: Turtle Graphics
Watch the video to learn about turtle graphics and how to draw figures by moving and rotating the turtle in a Windows Forms GUI application: https://youtu.be/WwSjMHo0Fx4.
What Shall We Build?
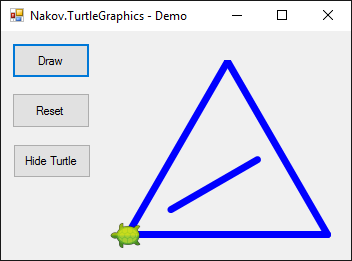
The purpose of the following exercise is to play with a "move and rotate" drawing library, also known as "turtle graphics". We will build a graphical application (GUI App) in which we will draw various figures by moving our "turtle" across the screen via operations like "move 100 positions ahead", "turn 30 degrees to the right", "move 50 more positions ahead". The application will look approximately like this:
Turtle Graphics – Concepts
Let's first get familiar with the concept of drawing "Turtle Graphics". Take a look at the following sources:
- Definition of "turtle graphics": https://wiki.c2.com/?TurtleGraphics
- Article on "turtle graphics" in Wikipedia – https://en.wikipedia.org/wiki/Turtle_graphics
- Interactive online tool for drawing with a turtle – https://blockly-games.appspot.com/turtle
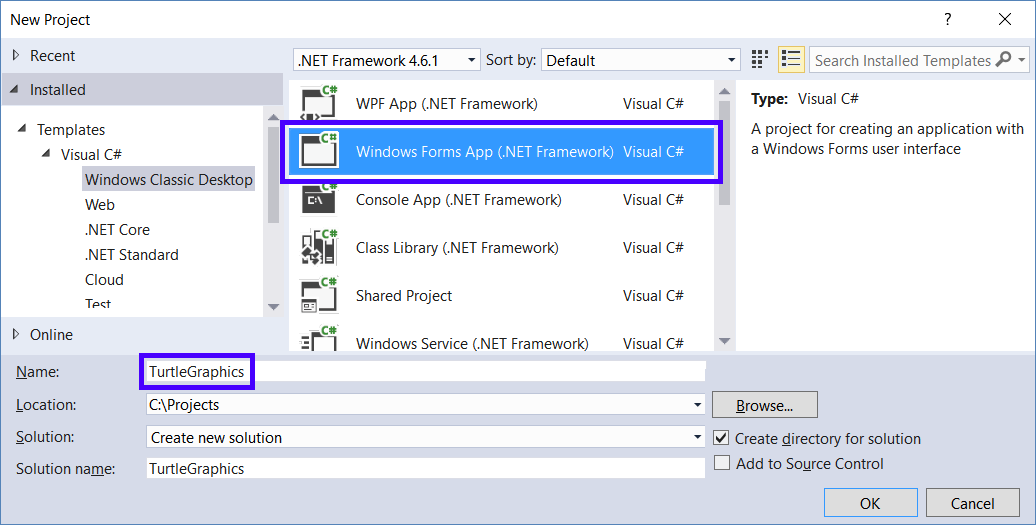
Creating a New C# Project
We will start by creating a new C# Windows Forms Project:
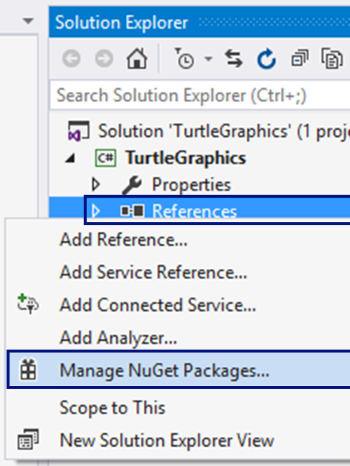
Installing Turtle Graphics NuGet Package
Install the NuGet package "Nakov.TurtleGraphics" to your new Windows Forms project. From Visual Studio you can add external libraries (packages) to an existing C# project. They add up additional functionality to our applications. The official repository for C# libraries is maintained by Microsoft and is called NuGet (https://www.nuget.org).
Right-click the Solution Explorer project and select [Manage NuGet Packages…]:
A NuGet package search and installation window will open. Let's search for packages by keyword nakov. A few packages will be found. Select Nakov.TurtleGraphics. Click [Install] to install it to your C# project:
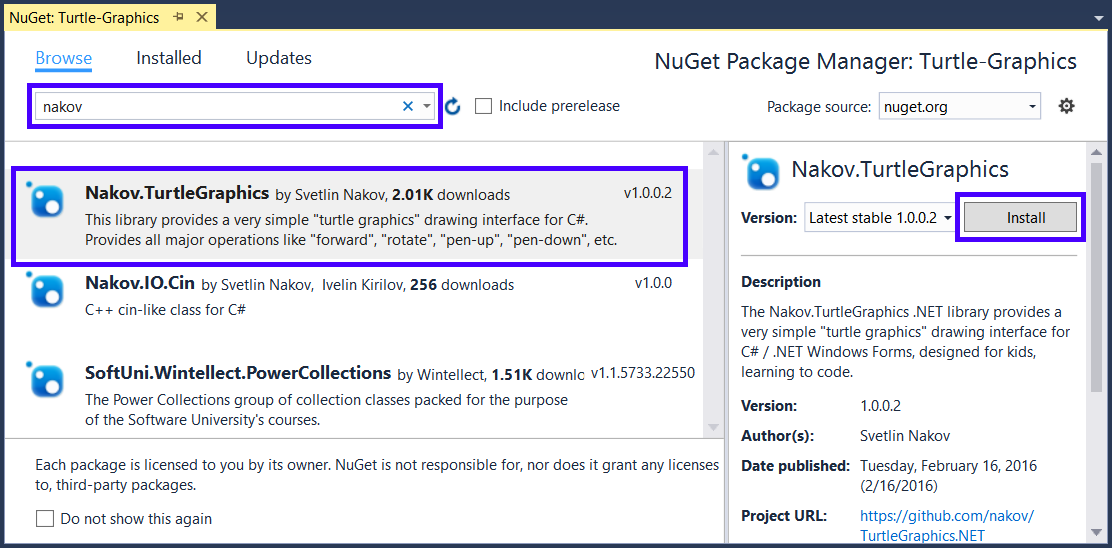
The external library Nakov.TurtleGraphics is already included in our C# project. It defines Turtle class that represents a drawing turtle. In order to use it, add (Form1.cs) in the C# code for our form. Add the following code at the top of the file:

Adding the Buttons
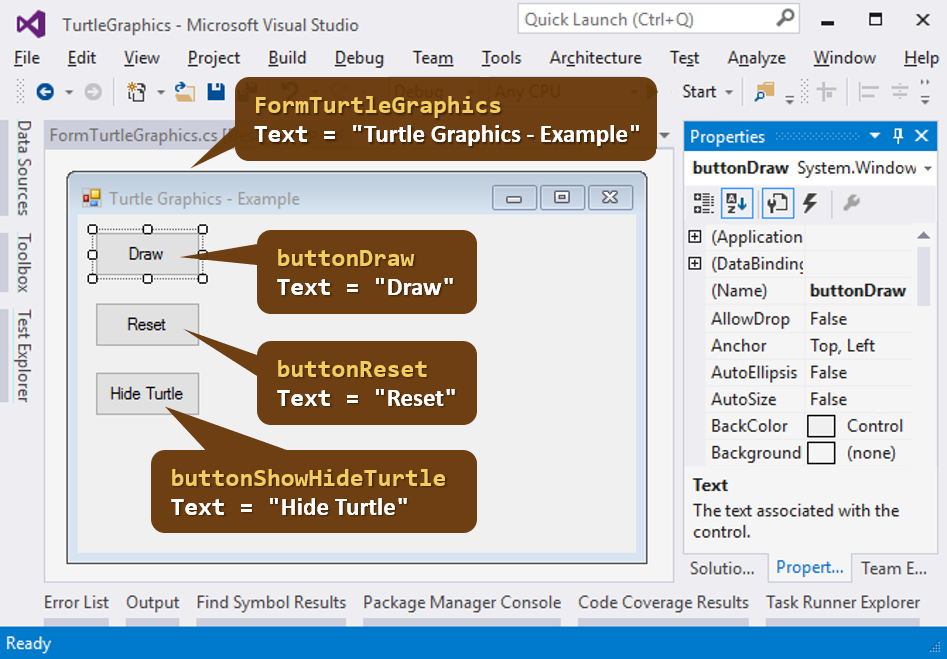
Now we need to add three buttons into the form and change their names and properties as stated below:
Implementing the [Draw] Button
Double-click the [Draw] button in order to add the code that will be executed upon its pressing. Write the following code:

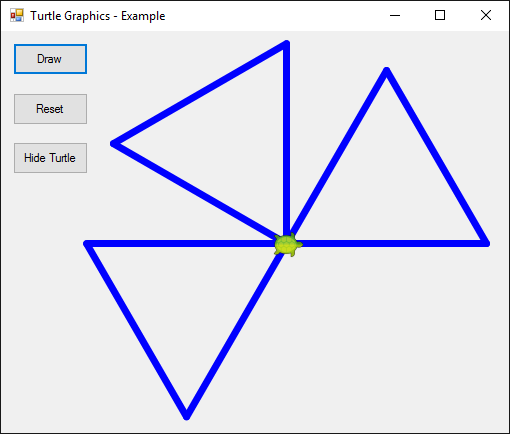
This code moves and rotates the turtle that is initially in the center of the screen (in the middle of the form) and draws an equilateral triangle. You can edit it and play with it.
Testing the Application
Start the application by pressing [Ctrl+F5]. Test if it works (press the [Draw] button a few times):
Adding Complexity to the Turtle Drawing Code
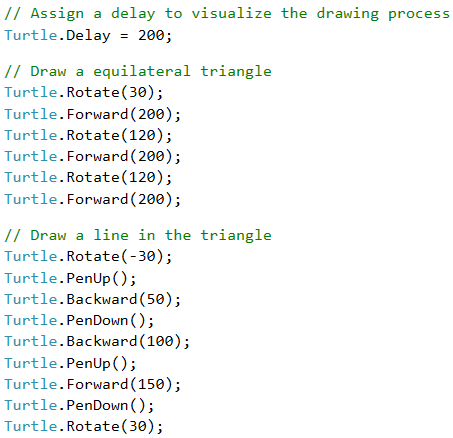
Now you can modify the turtle code and make it more complex:
Start the application again by pressing [Ctrl+F5]. Test whether the new turtle program works:
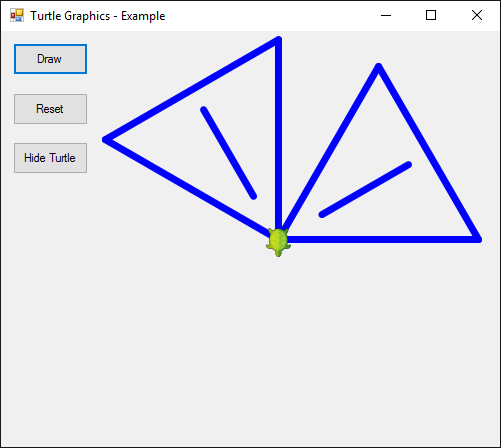
Now our turtle draws more complex figures via a nice animated motion.
Implementing the [Reset] Button
Now let's write the code for the other two buttons. The purpose of the [Reset] button is to delete the graphics and to start drawing from the beginning:

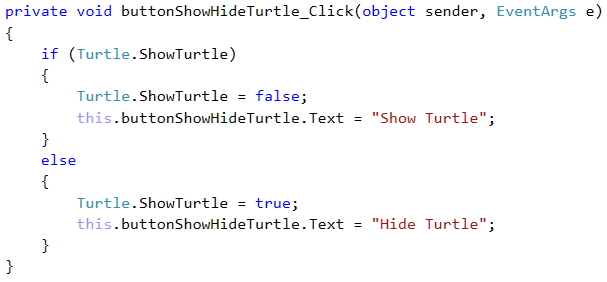
Implementing the [Show / Hide Turtle] Buttons
The purpose of the [Show / Hide Turtle] button is to show or hide the turtle:
Once again, start the application by [Ctrl+F5] and test whether it works correctly.